[NOTE: I started this draft several months ago and have come back to it many times but what I thought would be a nice block of time to handle household stuff, craft, and blog while she was at school has proven to be quite… aspirational ?]
Our daughter started preschool recently and I am apparently dealing with my mixed feelings by staying busy with crafts ? I am so happy she gets to be around more kids and learn, but I am also in my feelings about her starting school when it feels like yesterday that we brought her home… I know most parents go through this so heartfelt hugs to every first time parent sending their little ones off for the first time.
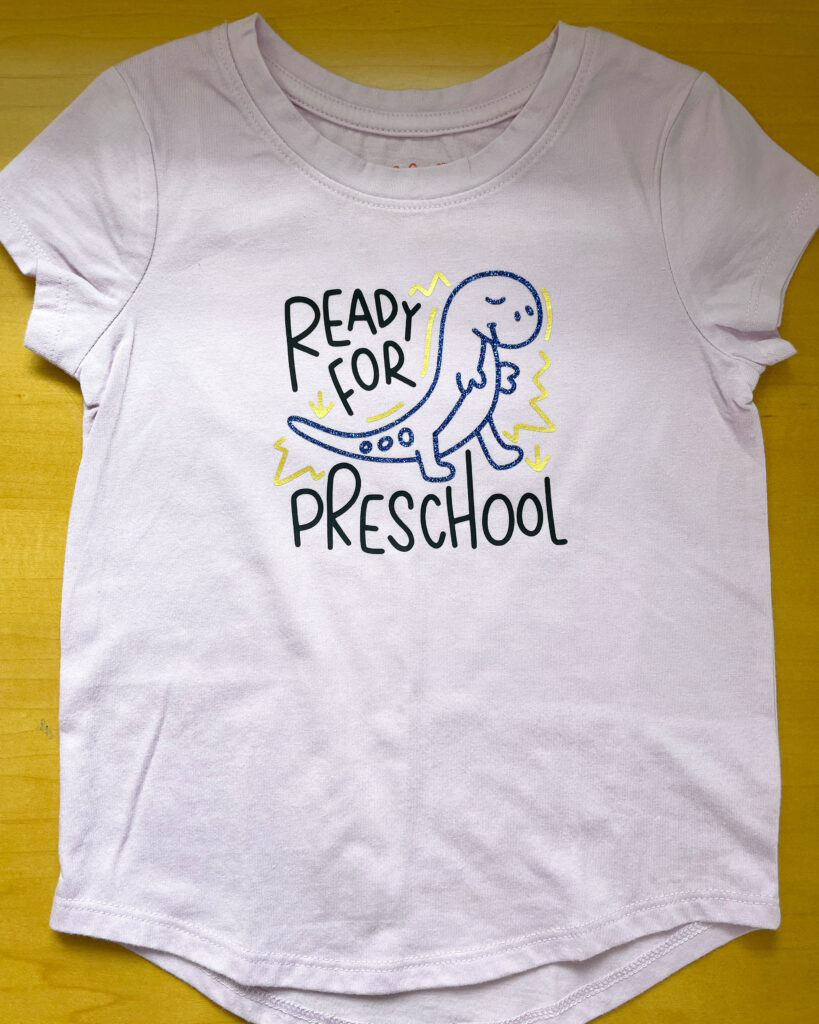
Initially, I wanted to make Lily a first day of preschool shirt… but it turned out so cute and we had Back to School Night the day that I made it! The timing seemed serendipitous and I still had the weekend to make her another shirt so she got to rock her “Ready for Preschool” shirt at Back to School Night. I headed to one of my favorite sites for free SVGs and let Lily pick between the Tyrannosaurus Rex and Unicorn options. She happily chose the T-Rex version and the colors she wanted. I love that you can always personalize an SVG by using whatever color vinyl you want! She loved this shirt.
First Day of School
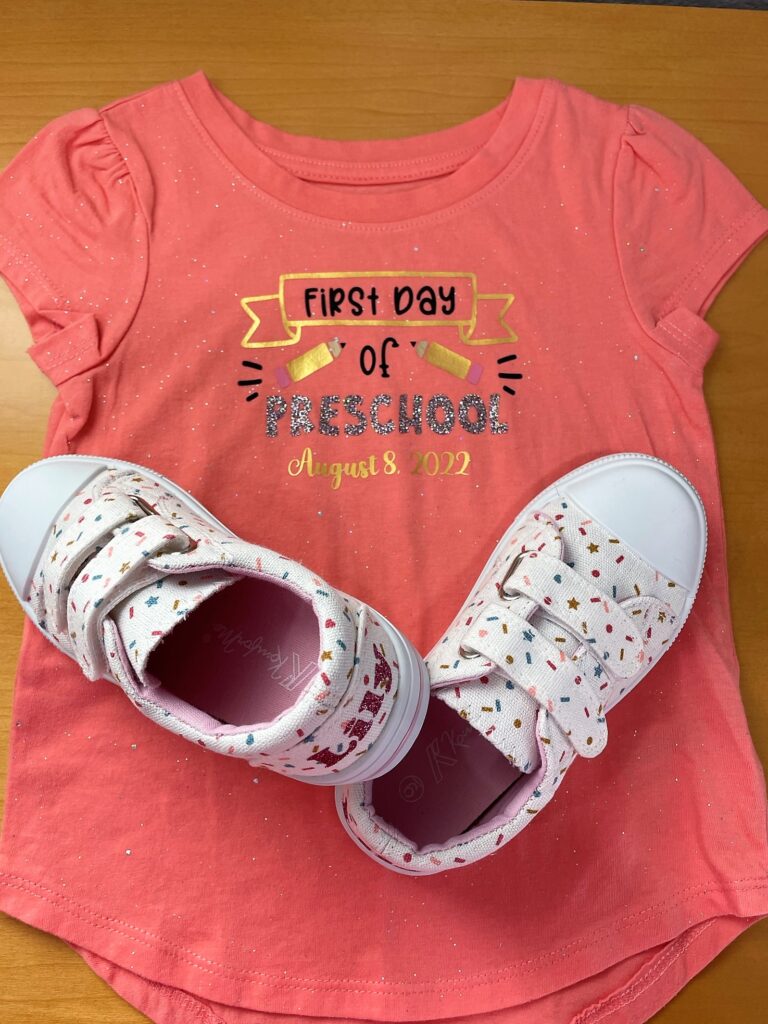
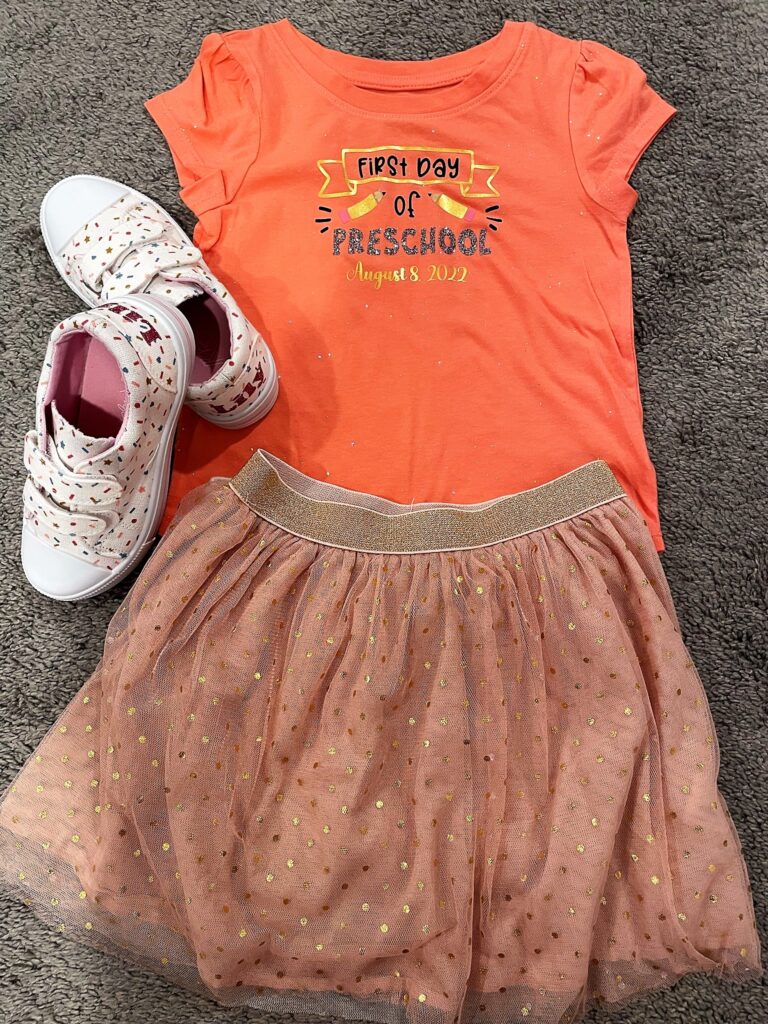
For her first day of school, I used the First Day of Preschool SVG from lovesvg.com. It turned out really cute. I used a sparkly t-shirt from Target and made sure to use some glitter HTV for my girl. A crafty friend was visiting when I made Lily’s shirt and she made the brilliant suggestion to make Lily a first day shirt for every first day of school and save the shirts to make Lily a t-shirt quilt as a high school graduation present (cue the tears about thinking of my baby graduating and going to college…).
Home Decor
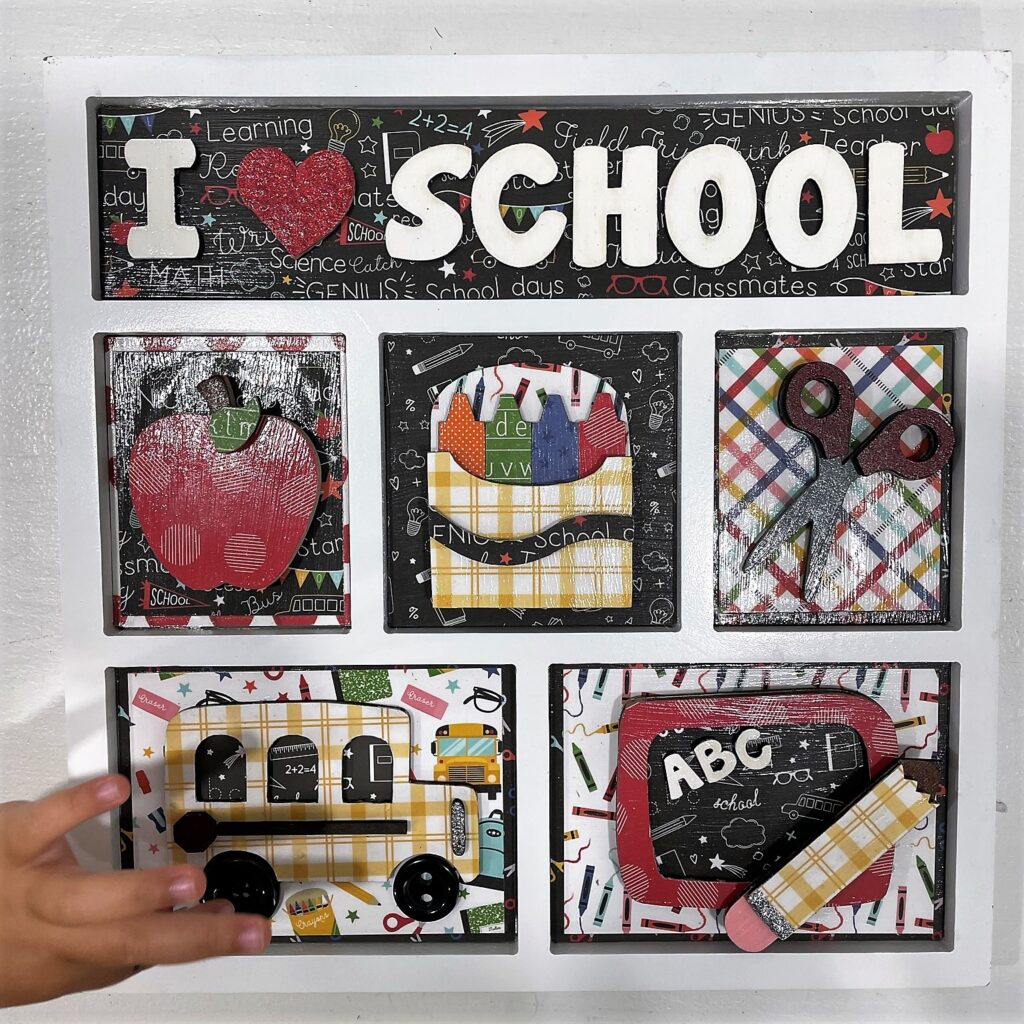
I previously bought a Foundation Decor School Shadow Box kit at my favorite store, Paper Bunny, to make when Lily started school. It’s no longer available at Paper Bunny but can be bought here. I got the Echo Park First Day of School 12×12 Cardstock pack at Paper Bunny and started by choosing my cardstock, tracing the shapes of the wood on the cardstock, and then cutting them out.
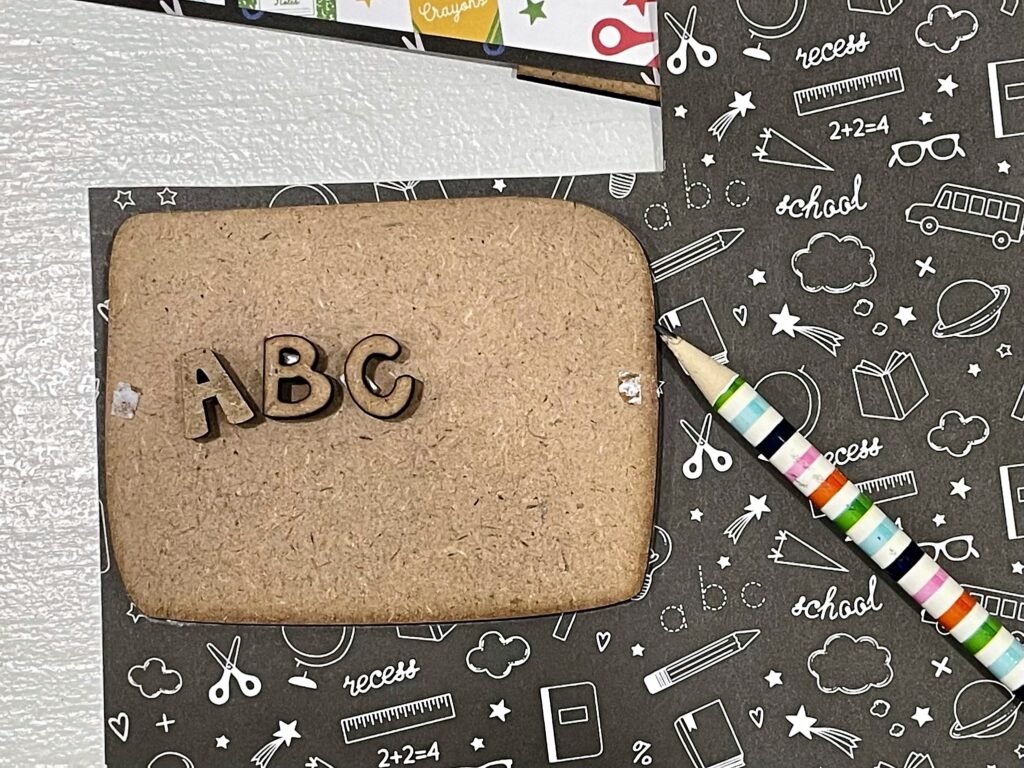
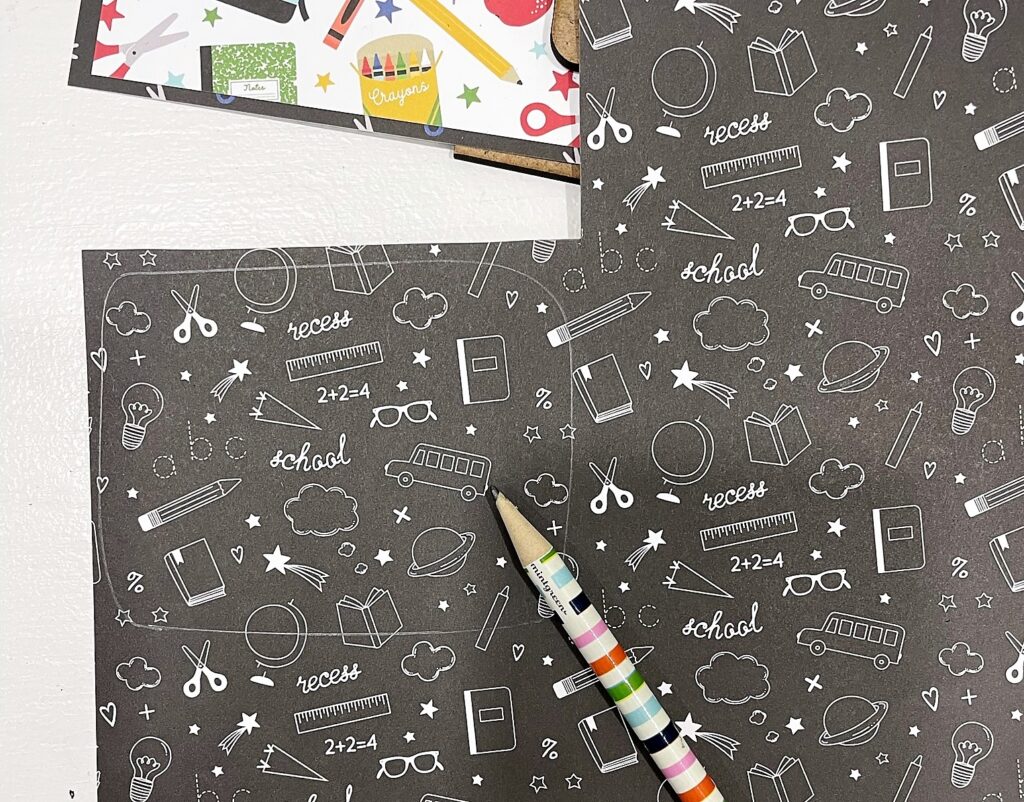

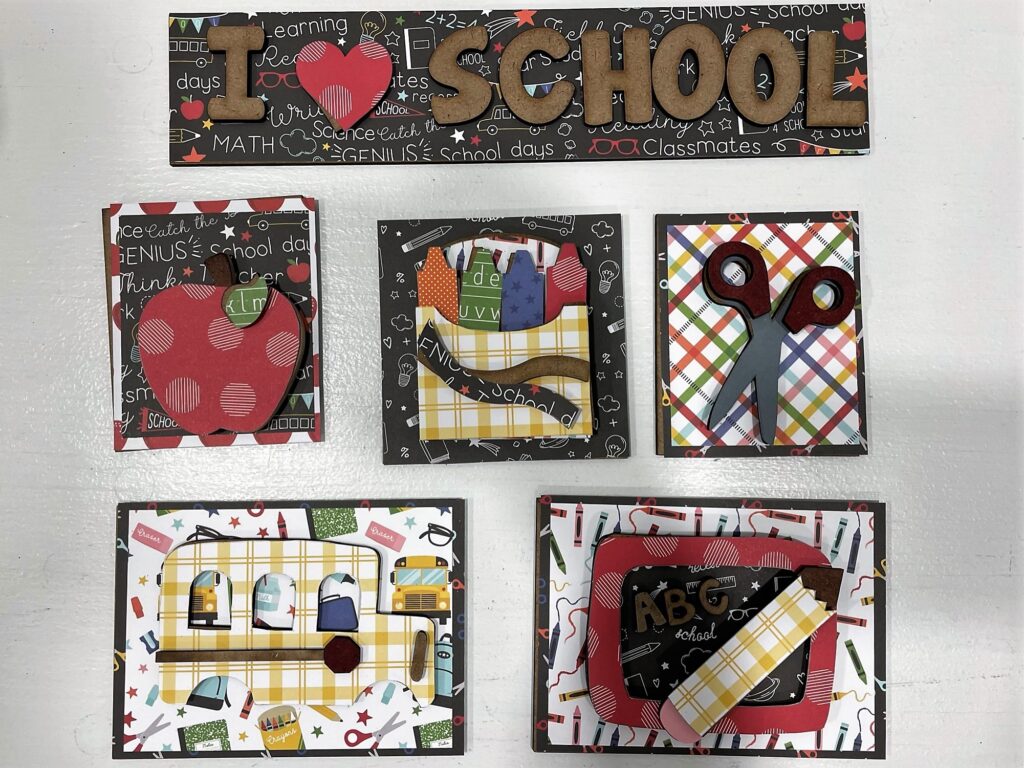
After cutting all of the paper, I applied them to the wood with Mod Podge. I used a foam brush to add Mod Podge to the wood and the paper, then smoothed the paper on top of the wood. This usually helps keep bubbling to a minimum. Once I have smoothed it down, I put another layer of Mod Podge on top. After it has dried, I file the excess paper off the sides. It is a bit time consuming but I enjoyed the process and here is the final product (with a gorgeous little hand exploring the button wheels) ?